Making modern plugins
With Openplanet 1.18, the plugin system has seen a big update: Now plugin archives can be created instead of single scripts in the Scripts folder. This guide explains how to create a plugin with the new system. We're not going to cover scripting so much here, please read the scripting tutorial for this.
Preparing the folder
The new plugin system allows us to have a folder for every of our new plugins - so let's get started by creating a folder for it. Navigate in the file explorer to C:/Users/<username>/Openplanet*/Plugins (create the folder if it's missing). We'll create a folder called TestPlugin for our new plugin. Into this folder we can later place all script files, signatures etc. in the future.
info.toml
If you have read the scripting tutorial, you may remember the metadata section for the plugin name, author and so on. With modern plugins, we don't need to write the metadata into the script files anymore - there's a dedicated file for all metadata and information instead. This file has to be named info.toml and should be placed right into our new TestPlugin folder. In case you haven't worked with .toml-files before, you can quickly look up the Syntax on Wikipedia.
The first thing we will write into our info file is the obvious metadata. Our plugin is called "Test Plugin", it's made by us and it's a plugin for testing things, so let's write our first metadata into the file:
[meta]
name     = "Test Plugin"
author   = "Timmy"
category = "Testing"
version  = "1.0.0"
For our plugin we don't need more metadata than this, but there are a lot more options available. You can read more about them here.
This is all we need to know about the info.toml file... but, that doesn't make our plugin do anything yet.
Writing the scripts
We need an .as file in the folder to have our script actually do something. Openplanet will load all Angelscript files in the plugin folder at once, so it does not matter how the script files are called containing the callbacks like void Main() and so on, but you should pick file names so you can easily identify which plugin files contain what. We're going to call the one script file we need for our simple plugin Main.as to keep things simple.
We're not going to do fancy things today, we just wanna write something to the Openplanet log, so our plugin will be as simple as
void Main() {
    print("Hello from the new plugin system!");
}
If you previously had made more complex plugins that had multiple .as-files, you may remember needing to use the #include preprocessor directive. This is no longer necessary, as Openplanet loads the whole plugin directory with all its scripts as a single script module. All files are taken together as a single big script so to say. As such, be careful to avoid multiple definitions of things with the same name, as the script may not compile then.
Plugin dependencies
With Openplanet 1.21.0, the option to depend on other plugins was introduced. This allows for interactions between plugins and more complex structures. Refer to the detailed page on the details of plugin dependencies.
Testing everything
Now we just need to make sure that everything works, so start Trackmania and open the Openplanet overlay. We should open the log window first to see if, when we load the plugin, actually something is written into the log.
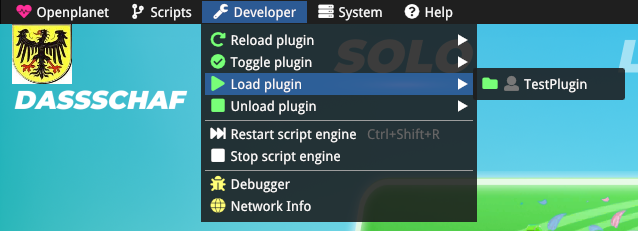
In the Scripts menu item, you have the option to load a plugin called "Test Plugin" now, that's exactly what we just created!
If everything went to plan, we should see two new lines in our log now - first, that a plugin was loaded and second, the line we wanted to see in the log:
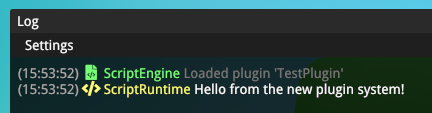
Congratulations, you made your first plugin! Now we just have to figure out, how to make it into these .op-files for plugins, so we can upload it here and share it with the world.
Packing the files
If you wonder what's behind the .op files... it's just a renamed zip-file. No magic involved.
In order to create it, you open the folder we created back then in the file explorer and select all the files inside the folder and make a new zip archive (for example with 7-zip). It's okay to use compression, but don't put a password on it. Also make sure it's a zip file - rar files do not work!
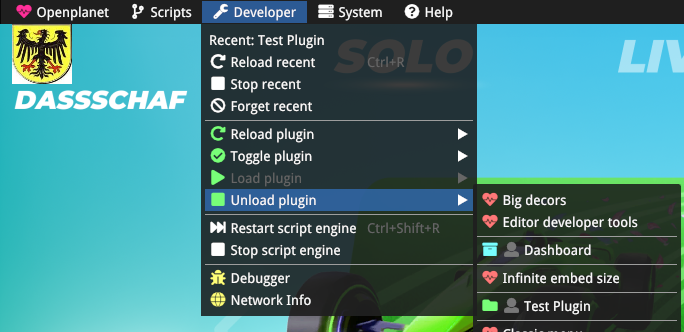
If you created your zipfile with 7-zip, your file is probably going to be called TestPlugin.zip, since that's the folder whose contents we packed into an archive, so we'll rename the file to TestPlugin.op and place it into the Plugins folder. To check if everything worked, we'll unload the plugin inside the folder (look for the folder icon in front of the plugin name).
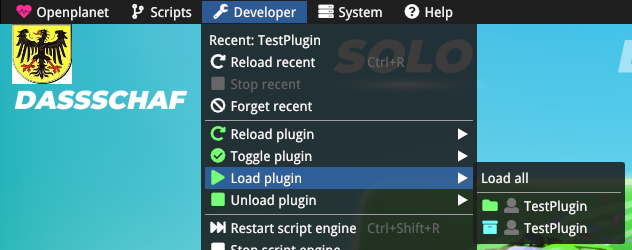
Now you can load the plugin again from the archive we've created (look for the box icon in front of the plugin name).
It loads, we'll see the message in the log we wanted to see... this means we're done! We've successfully created a plugin with the new plugin system.
Signatures
Previously, if a plugin should be used with non-Club editions of Trackmania (2020), it needed to have a signature for the files invovled. Here it's no different. Every file of the new plugin has to have a signature file (info.toml has info.toml.sig and so on). Plugin signing is handled automatically by the review system on the website. Simply upload your plugin version for review to start the process.
Read here for more information.
